Tuesday, November 22, 2011

Snowflake Window Clings

It is about to be that snowy time of year again, so I thought I would get my students ready with a little winter project.  I teach Art classes to K-5th graders, so I'm always looking for creative, fun, good- for- all- ages types of projects to do with them (and cheap ones too... our program's budget is very very small). I came across this idea for window clings from Martha Stewart actually, and thought the kids would really enjoy it.

I have to test out each project before I have my classes give it a go, so I recruited my roommate and we got down to business.


Supplies:

3-Dimensional Fabric Paint (puff paint)
Wax Paper
Paper
Pen/Marker/Pencil...whatever is within reach
Cooking Sheet (optional)
Glitter (optional)


First we began by drawing our snowflake design on a sheet of paper. Remember to keep it relatively simple, making sure everything you draw is somehow connected to the snowflake.


Now take your wax paper and place it over the stencil you have drawn.


Begin to carefully and gently trace over your lines with your fabric paint. I picked out colors like white, crystal, silver, white with glitter...you get the idea, any type of snow-like color.


One little tip: Your first squirt of paint, do off to the side. A big glob will probably come out first, and then you'll get a nice line.


I had some glitter left over from my Glitter Shoes project, which by the way, they got many, many, compliments when I wore them out. 
So we sprinkled some glitter on top of our wet paint.


Now to dry!
The cookie sheet is useful if you want to carry them to a different area when you are done. Otherwise, as long as you keep the snowflakes flat, they'll be just fine.  Depending on how thick the lines you make are, they seemed to take between 2 and 4 hours to completely dry.
Once dry, carefully peel them from the wax paper, dampen your window with some water, and stick!


So I decided to give this a try with my 3rd- 5th grade students yesterday.  They really loved the project! To prep it, I made 60 different snowflake designs on white paper ( all different), and I cut out the glitter portion of the project...I don't need any extra clean up work. The great thing is you can reuse each stencil, so you don't have to make one for each student.
The lesson that you can do along with this project is the explanation of every snowflake is unique and different, what makes you unique, special, and different from your friends? How are you the same as each other as well? 


We decided to donate all of the snowflakes we made to decorate Children's Hospital, along with a card one of the students made saying "We made you these snowflakes, because they are all beautiful and unique, just like you!"
Very proud of my little guys during this season of giving.

Happy Holidays!

--Emily Jo


Labels: , , ,

Sunday, November 20, 2011

A new twist on the classic "Friendship Bracelet"

Friendship Bracelets for adults, how fun! 

Supplies:

Thread
2 bobby pins
Scissors
A bracelet with large chain links


This bracelet was in need of an update. I got inspired by a tutorial I saw, and decided to give it a try.


Cut each piece of thread to be 4 times the size of your bracelet. Do this twice for each color you chose. I chose 10 colors total, so I had 20 pieces of thread when I was done cutting.


Group the thread into 2 different piles. I chose to keep like colors together and separated mine between Pinks/Purples and Blue/Greens.


Tie the two groups together with a knot, leaving about 2 inches slack.


The bobby pins were a big help with this project. Slip them onto each section like shown, this is how you will weave your thread through each link.


Alright time to start! Lay your bracelet to the right of your thread. Start by weaving Group 1 (pinks/purples) through your first link from under the bracelet. Then place your Group 2 (Blues/Greens) on top of Group 1, then weave Group 2 through your link from underneath. 

This is all you do for the whole bracelet. Repeat, Repeat, Repeat.
Under, pull through, next Group over top, Under, pull through.


When I got to the end, I had a decent amount of thread left and I wanted it to look chunkier. I decided to go back down the bracelet in the same pattern.


Once you have the thickness you desire, Tie a knot in the remaining thread and trim the ends.

Now you can either wear your friendship bracelet...


Or give it to your best friend to wear!


--Emily Jo


Labels: , , , ,

Pixelated painting

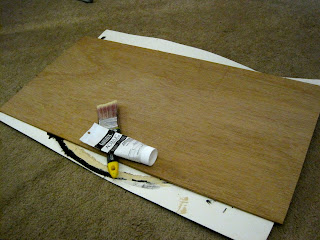
Being low on funds but in the mood to paint, I rummaged around my basement and came back up with a piece of plywood and got to work on a painting. I usually lean more towards mixed media when I create things that are purely visual, but I decided to just stick to paint this time. 


Supplies:
Acrylic paint
Plywood


First, I slapped on a thin coat of white paint as a sort of primer to even out the surface a bit. 


While the paint was drying, I sketched out a thumbnail of what I was hoping to create. I was inspired by the paper fringe on pinatas and wanted the composition look like a ray of sunlight coming through from the top right.


I tried to paint it with my palette knife and was quickly reminded how much I dislike them and switched over to a paintbrush after one row. Also a great tip for a paint palette - use tin foil to cover any flat surface(I used a tupperware lid). 


Here it is about halfway through. In the first couple rows I got anxious and wanted to sort of skip around, but it didn't work out well so I went back to being patient and painting one row at a time.


This project really didn't take a whole lot of time, probably about 2 hours from start to finish. All done and up on the wall, and I spotted another piece of plywood in the basement so I may have to make this one a pair. 

--Heather

Monday, November 14, 2011

Painted Rug

Yes, you read that correctly, I decided to paint a rug this week. I had actually been thinking about this project for a while and read many tutorials on others' experience with this task. I had this basic round Ikea rug that had become victim to hair dye over the past few years so it was a prime candidate for a makeover. 

Supplies:
Rug
Paint - I started out using acrylics and switched over to latex paint
Stencil
Paint brushes


Here we go, I didn't end up using all those paint colors, but I wasn't sure yet what colors I was going to use. I also picked up that $5 stencil at Michaels along with the 39 cent brushes(which I would NOT recommend, I broke all of them within 5 minutes).


I watered down the acrylic paint in hopes that it would saturate the rug more evenly. 


As you can see, the red isn't completely covered after the first coat, so this is where I switched over to the latex paint and a bigger paint brush.


I let the black paint dry overnight and then mixed up some paint for the stencil. I decided to jump straight to the latex paint and luckily had some colors leftover to make a light beige.


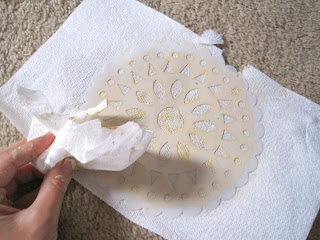
The stencil worked pretty well, the hardest part was making sure the back side of it stayed clean for each section. 


I used the small sponge brush, one I had from previous projects that wasn't designed to break instantly, to paint the stencil on and get into all of the little details. 


Once the stencils were done I pulled out the big brush and slathered the rest on. 


Looks like it has Mr. Wizard's approval.


Obviously the texture of the rug is not at all like it was before, but I knew that going into the project and am happy with how it came out. Someone had asked me if I needed some sort of sealer coat to protect it from wear and though this bathroom doesn't see a lot of traffic, I guess we'll just have to see how this stands the test of time.

--Heather

Saturday, November 12, 2011

Skeleton Key Necklace

I've been making a lot of jewelry lately, and this old skeleton key was begging to be worn.

Supplies:
Key
2.3 mm chain
Acrylic Paint
Toggle Clasp (closure)
2 Jump rings
charms/beads
wire
wire cutter

First I decided to paint my key using acrylic paint.

I wanted my necklace to not just be a single key on a chain (even though you could do that as well.) So I decided to bling it out by adding some beads and loose charms I had. So first I took some armature and strung up some beads...


Then I wrapped it around the top of my key to create a loop for my chain to fit into.


I then found all the random charms I could find and strung them through my chain, putting the key in the middle.


I attached my jump rings to my chain and the toggle clasps to the jump rings.
(I think this heavy of a necklace would look best on a longer chain, resting mid chest or longer. So make sure to cut a long enough chain!)


And here are some "myspace" type photos to show you the outcome:


This necklace would look cute on ribbon as well! 

--Emily Jo


Thursday, November 10, 2011

Rainy days were made for cooking!

I work at a pizza place and you'd probably think that on my days off I would stay clear of the kitchen, but that is not the case. My days off usually have me trying out new recipes and taking the kitchen over for myself, and this day off was no different. I knew I was going to make the Larabars, if you haven't tried them, they are granola-y type bars made with only fruit and nuts, no added sugars or fillers, but the downside is they are ridiculously expensive. I had seen many recipes online on how to make your own versions so I figured my day off would be a great time to try it out. Since I was already on my way to the grocery store, I decided I should come up with something to make for dinner - kale soup! I have been craving kale lately and the crock pot has become my favorite appliance(just ahead of the food processor) so I knew how my day was going to go from there.


Supplies/Ingredients:
Kale soup -
1 bunch of kale
1 chopped carrot
1 chopped celery stalk
2 small or 1 medium diced onion
3 cloves of minced garlic
Small bag of baby potatoes cut in half
12 oz of sausage (I used vegan Smoked Apple Sage)
1 can of navy(or any white bean) beans
2 vegan chicken boullion cubes
5 or so cups of water
Salt and Pepper
Dash of sage
Dash of thyme

Larabars - 
Chopped nuts of choice(I used walnuts)
Apple of choice(I used granny smith)
Dates
Figs
Coconut oil
Coconut flakes
Dried cranberries
Oat bran
Cinnamon


I started with the kale soup knowing it would need to simmer for at least 4 hours.


The potatoes were just too cute to resist, though I'm sure any other potato would have worked just as well in this soup.


Full to the brim and ready to work its magic!


While being taunted by the smell of the soup, I got to work on the Larabars.


Using that trusty food processor, I chopped everything down to a size that is relatively the same - a little bigger than grains of sand. 


Here are the ingredients ready to be mix and matched for different varieties. All of the Larabars use dates and figs as their base and sweetener. They also all have nuts in them almost as a binding agent. I used the coconut oil to smooth the mixture out a bit, and when necessary I added the oat bran to thicken it up. 


Here are the three variations I made from left; Apple Cinnamon(based off of Larabar's Apple Pie), Cranberry Coconut and a mixture of the two(just to use up the rest of the ingredients).


I then patted the mixtures out on a cutting board and divvied them up. 


Ready for the fridge!


What good timing, once I wrapped up the Larabars, cleaned up the disaster of a kitchen and got the dishes started my soup was ready to eat! It was a bit early for dinner but I hadn't eaten lunch yet so this was a perfect mid-afternoon meal to fuel me back up for yoga tonight. Bon Apetit! 

--Heather