Marbled Glass
Well hello old friends- the Two Girls have been very very busy lately but we are back with an awesome project! This project was so easy and I already had all the supplies (and if you're a chick, you probably have all the supplies already too).
Supplies:
Glassware with a flat bottom
Assorted nail polish
clear nail polish
straw or pencil or toothpick
container filled with water
nail polish remover
q tips
masking tape or painters tape
Fill up your container with water and pick out a few shades of nail polish that would look good together.
Tape off the sides of your glassware-for this project I used some shot glasses. You can do this with any glass, as long as it has a flat bottom.
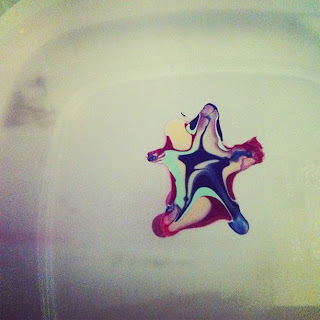
Now pour in a few drops of your nail polish into your water, layering the colors on top of each other.
Using a straw or toothpick or pencil (anything with a sharp, pointy tip you don't mind ruining), drag and swirl around your polish. WORK QUICK! The polish starts to harden pretty fast, so you need to be speedy. (Hence the limited amount of photos for this project).
Dip in your glass just below the surface. You can even gently swirl it around for an added marble look.
Let them dry for about 2 hours or until they are not tacky anymore.
Peel off your tape and using your nail polish remover and q-tips, touch up any color that dripped through your tape. Then layer a coat of clear nail polish across the bottom to protect your design.
How fun! What a great idea for a gift! I'm thinkin' bridesmaids gifts for your bridal party in the colors of your wedding- wine glasses maybe? Endless possibilities, so give it a try!
Bottoms up!
--Emily Jo


0 Comments:
Post a Comment
Subscribe to Post Comments [Atom]
<< Home