Beaded Chandelier
I have seen beaded chandeliers all over the place recently and decided to take one on as project. This turned out to be a time-consuming project, but it was so worth it because the outcome was a beautiful customized chandelier for less than $40!
Supplies:
Hanging wire basket or old lamp shade
Beads
String
Embroidery needle
Paint
Clothes hangers or wire
Light kit
Hemp string
Tape
Pliers
Wire cutters
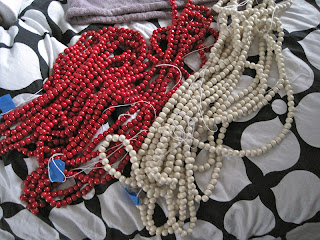
So the wire basket is just one of those hanging planters you can pick up at your local hardware store or nursery. The beads I ordered in bulk from China and actually half of that $40 budget went to shipping these bad boys here, so if you have a large collection of beads or know of a cheaper way to source them, go for it!
Time to start stringing! This part took up the majority of my time on the project - I had 4000 beads and it took me 4 hours to string them all - so if you can get your beads pre-strung, definitely do it.
To keep them from falling off the end of the string I just wrapped a piece of tape around it.
Finally all strung!
Next I spray painted the basket white to blend in with the beads better.
Now here is something I wish I had decided on before I strung all the beads separately. I ended up going half and half on the colors - 20 beads each - per strand. This gave me 44 total strands to attach to the wire frame.
Starting to attach the strands. I just knotted them at the top and bottom, making sure that the sections on the basket corresponded to keep them in order. Once they were all attached I dabbed a bit of glue onto the knots for extra strength.
It's already starting to look pretty fancy!
For the structure to hold the light kit in place, I went back to my trusty wire hangers and snipped off the long bottom part.
And attached like so!
Just fold those ends in nice and tight so that they stay in place.
Then I placed the light kit in between two of the wires to make sure it was centered and folded the second one into place.
You can sort of see, I also cut a third wire in half and attached them perpendicular to the first two for added stability. And then just using some pliable wire I found, I wrapped it around the base of the light kit to attach it.
Then I took some black hemp and wrapped it around the top and wire bracing to give it a finished look.
Unfortunately I have very limited space at the moment and no where to really hang this, but soon enough this will be on prominent display and casting those beautiful shadows on the walls of a new apartment!
It's even so pretty unlit! There are so so many ways that you could switch this up too; glass or acrylic beads would refract the light beautifully, using multiple hoops as the structural base would give it a more classic chandelier shape or simply just hanging the beads straight down from a single hoop would keep it more modern. The possibilities are limitless!
--Heather


0 Comments:
Post a Comment
Subscribe to Post Comments [Atom]
<< Home