Thursday, June 28, 2012

Branded Leather Luggage Tags

While working on all of the wedding projects, the one thing that took me the longest to decide on was a wedding gift. I knew I should probably make something for them, rather than buy a traditional gift, but my creative inspiration tank was running low and everything was coming up so quickly! About three days before the wedding, I finally got an idea and ran with it - branded leather luggage tags.

Supplies:
Leather scraps
Stencil cutting tool
Leather Glue
Scissors
Nail polish
Paint brush
Hammer
Nail


So once I decided WHAT I wanted to make them, I had to figure out HOW I could successfully accomplish it. I wandered around Michael's for a while before I saw the stencil cutter. It is essentially just a pointy piece of metal that gets hot - exactly what I needed! 


I picked out two pieces of leather that I thought would look good together to use as the front and back of the tags. It turned out that the lighter brown was a faux leather(though convincingly leather-like) which ended up being an issue later on. So make sure that you use real leather, or account for this later on.


Next I measured out rectangles 2.5"x4" and cut off the corners of one end. 


Here is the front and back together. 


Next, spread a thin layer of the leather glue on each piece. I used a business card to get the glue nice and thin.


Once glued together, let the tags dry under something heavy. Fortunately I am studying for the MTELs and have a few hefty books laying around that worked perfectly. It only took about 10 minutes to dry. 


While the tags were setting up, I started working on what exactly I was going to brand the tags with. I had thought that maybe my technique for the printed wooden signs might work, but sadly it didn't. What did work was just simply printing out the template and tracing over it with the stencil cutter.  


After you've traced your stencil, remove it and go over any lighter spots  a few times. 


Next I used a hammer and nail to poke a hole through the tags for a place where the hanging attachments to go. 


I just cut long thin pieces of leather to use as the attachment strings.


Now here is where you can see that the faux leather didn't work so well with the branding. I had traced their names onto the back side of the tags, but they just don't show up as well. Here I added little leather hearts to the corners. 


I initially tried using watered down paint to fill in the edges that the branding tool made, but it just looked sloppy. So in a last ditch attempt to save these, I whipped out some gold nail polish and painted over their names. Luckily the craft gods were smiling down on me and the nail polish did the trick.


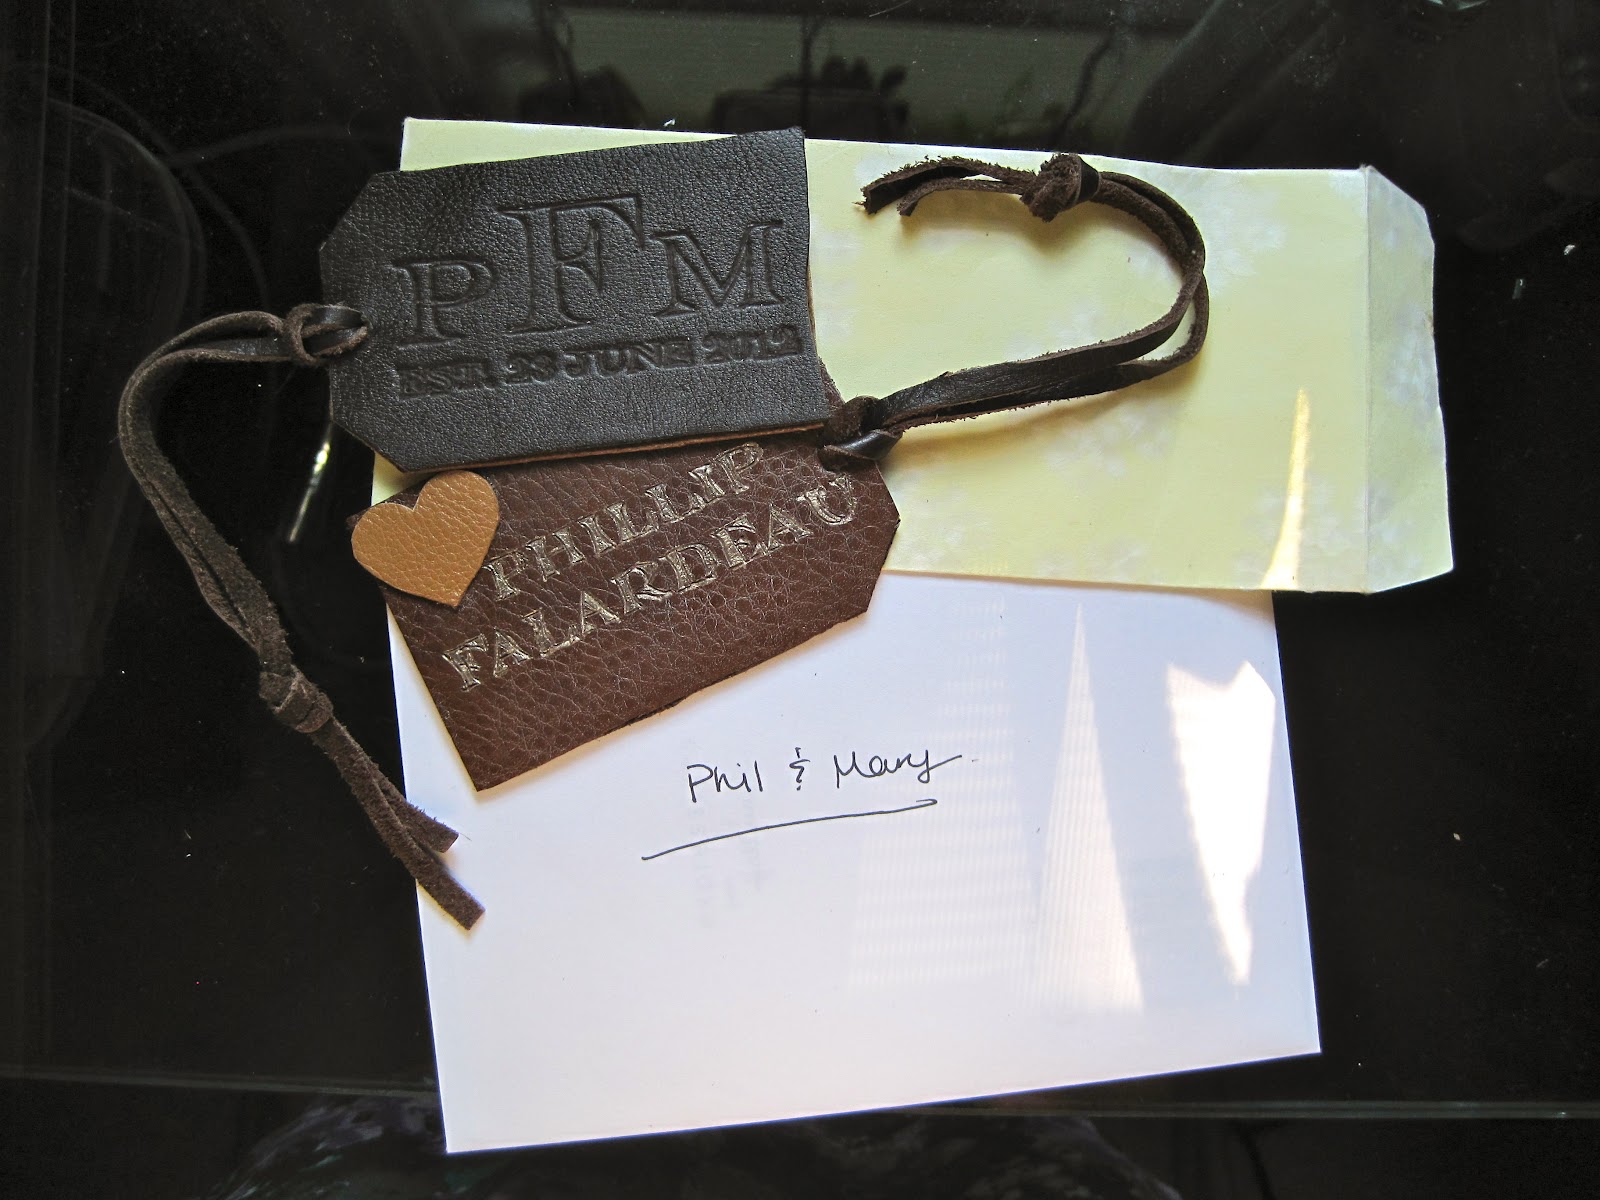
All finished and ready to be wrapped up! This project from beginning to end probably only took a couple hours, and the total cost ran me around $35 and that includes a tool that I can use in the future as well. So if you're looking to make something customizable either for yourself or as a gift, I would definitely recommend this!

--Heather

Tuesday, June 26, 2012

Wedding Weekend Wrap-Up

 As some of you may know, my brother got married this past weekend. I had been working behind the scenes on a few of the design details as well as the rehearsal dinner, which was held at our house. I didn't want to ruin the surprise for the guests attending, so I've been recording my projects and am so excited to finally share them all! So here is my wedding weekend wrap-up!


I had mentioned the wedding centerpieces back in March, so Mary decided that she loved the look of the frosted glass, but felt the colored glass was a bit too much for what she had in mind. 


So with the help of my cousin, Jessie, we got to work frosting upwards of a hundred mason jars. We were lucky to know someone with a very large collection of jars and willing to part with some. 


We tried a few different ways to get that wrapped up look. The electrical tape ended up leaving a black residue on the glass that was(or so I heard, my aunt Kathy was kind enough to do the cleaning portion) a pain to get off. The twine made the lines on the jars not as sharp as we would've liked. So ribbon was the best choice. I have seen this done with wide rubber bands too, which is probably the way to go. 


Jessie and I giving the jars a first coat of paint. They ended up needing two, so keep that in mind when purchasing paint. 


Onto the next project! Mary wanted to display the place cards on a board with ribbons holding them up. So I used some scrap plywood, shelf liner, spray adhesive, a staple gun and vintage ribbon that my nana had saved. 


First I glued the shelf liner onto the plywood boards as a background to the ribbon. Then I just stapled the ribbon ends to the back of the boards as tightly as possible. 


Here are the three boards, ready for some place cards!


Next, I got to work on a program. Mary had a coupon to VistaPrint so she asked if I wouldn't mind designing a program for her. 


Using the basic layout and colors, I designed the place cards to correspond. 


And the table themes as well!


For the rehearsal dinner I used some leftover jars and wrapped a bit of twine around them and placed tea lights inside. To keep the tea lights from moving around, I put a 1/4 cup of epsom salts in the bottom of the jars. I also collected roses from around the yard and put them in vases with twine wrapped around them as well. 


The programs in their basket and ready to be passed out!


I had a few frames left over so I printed out a little sign to put near the guestbook. 


Here are the place card displays all set up!


You can see a frosted jar in the background and how nicely they add to the centerpiece arrangement. Also notice the place card in the foreground.


And while everything really came together perfectly, the best part of the whole day was seeing how happy Mary and Phil were. Congrats!

--Heather

Sunday, June 17, 2012

Marbled Glass

Well hello old friends- the Two Girls have been very very busy lately but we are back with an awesome project! This project was so easy and I already had all the supplies (and if you're a chick, you probably have all the supplies already too).

Supplies:
Glassware with a flat bottom
Assorted nail polish
clear nail polish
straw or pencil or toothpick
container filled with water
nail polish remover
q tips
masking tape or painters tape


Fill up your container with water and pick out a few shades of nail polish that would look good together.


Tape off the sides of your glassware-for this project I used some shot glasses. You can do this with any glass, as long as it has a flat bottom.


Now pour in a few drops of your nail polish into your water, layering the colors on top of each other.


Using a straw or toothpick or pencil (anything with a sharp, pointy tip you don't mind ruining), drag and swirl around your polish. WORK QUICK! The polish starts to harden pretty fast, so you need to be speedy. (Hence the limited amount of photos for this project).


Dip in your glass just below the surface. You can even gently swirl it around for an added marble look.


Let them dry for about 2 hours or until they are not tacky anymore.


Peel off your tape and using your nail polish remover and q-tips, touch up any color that dripped through your tape. Then layer a coat of clear nail polish across the bottom to protect your design.


How fun! What a great idea for a gift! I'm thinkin' bridesmaids gifts for your bridal party in the colors of your wedding- wine glasses maybe? Endless possibilities, so give it a try!


Bottoms up!

--Emily Jo